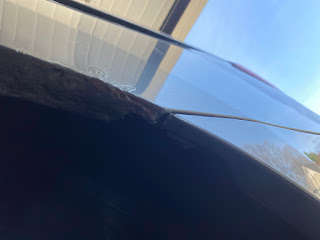
I noticed that the grey van had a bit of a rust bubble on the driver's rear quarter panel, near the top of the wheel arch. With the rust spot in a relatively inconspicuous place, and the van at the ripe old age of 12, I decided to take on the repair myself.
Let it be known that I have zero experience with bodywork. That said, I do have a Dremel and willingness to experiment, so I decided to go for it.
The first step was to get rid of that cancerous rust. I put on some safety glasses, selected a cutting tool, and went after it. From the side, I didn't have to grind away too much of the paint and rust:
However, as you can see in the next picture, I did slip and ground away some perfectly good paint. Not my intent, and I certainly muttered under my breath when that happened.
If you lie on the ground and look up at the fender, you can see where the metal folded in and where the real problem was:
I popped out to AutoZone to pick up some supplies, including grey metal primer, masking tape, a small can of Bondo, and some very fined finishing sandpaper:
When I got home, I took a closer look at the fender, and saw more rust lurking:
Back to work with the Dremel, I cut away more and more rusty metal:
Looking around, I still wasn't satisfied that I had eliminated all of the rust, so I ended up with a pretty decent-sized hole that I cut away:
With all of the surface prep done, I plied my Bondo skills for the first time. Again, since this was in a hard-to-see place, I wasn't concerned with perfection - I just wanted to eliminate any rust spread. My first attempt was kind of lumpy:
I worked it a bit more, smoothed out the Bondo, and taped off the area for priming. I also covered the wheel and tire to catch any overspray:
I have past experience with spray paint, so I slowly and methodically added layer after layer:
Hot halogen work lights helped accelerate the drying process:
My end result certainly isn't perfect by any stretch of the imagination. I could have spent much more time wet sanding to get closer to a nice, even finish.
However, my goal was "good enough," so I applied a top coat using the touch-up paint I keep for rock chips and called it a day:

A bit later on, I noticed a bit of rust starting behind the fuel filler door. I think this is a design flaw on Honda's part, as there is no drain hole. When it rains and you pop the filler door open, you can see where the water accumulates.
Once again, I decided to get out in front of the rust before it became a problem. I attached the rust spot vigorously:
Once again, my repair was crude but functional. The van still looks good from 20 feet away or so.
Another thing I've noticed is that as the van has aged, the headlights have become somewhat foggy and cloudy in appearance:
I got pretty aggressive with a polishing compound, and I was pretty pleased at the result. Again, not perfect, but much of the cloudiness had been polished away.
If you take care of your equipment, odds are it will take care of you. This is one of the reasons I enjoy hand-waxing and hand-washing the vehicles. It gives me a chance to really scrutinize the body and see if there are any potential issues out there, lurking below the surface. Rock chips on the nose? Just take care of them. Take an extra-long look after winter or a long road trip, particularly around where the hood meets the front fascia, as stone chips there are harder to see.
With over 177,000 miles now, the grey van is halfway to 300,000. With a bit of care and attention, I'm doing my part to ensure it gets there.
